A Fourways bathroom with daily use in mind
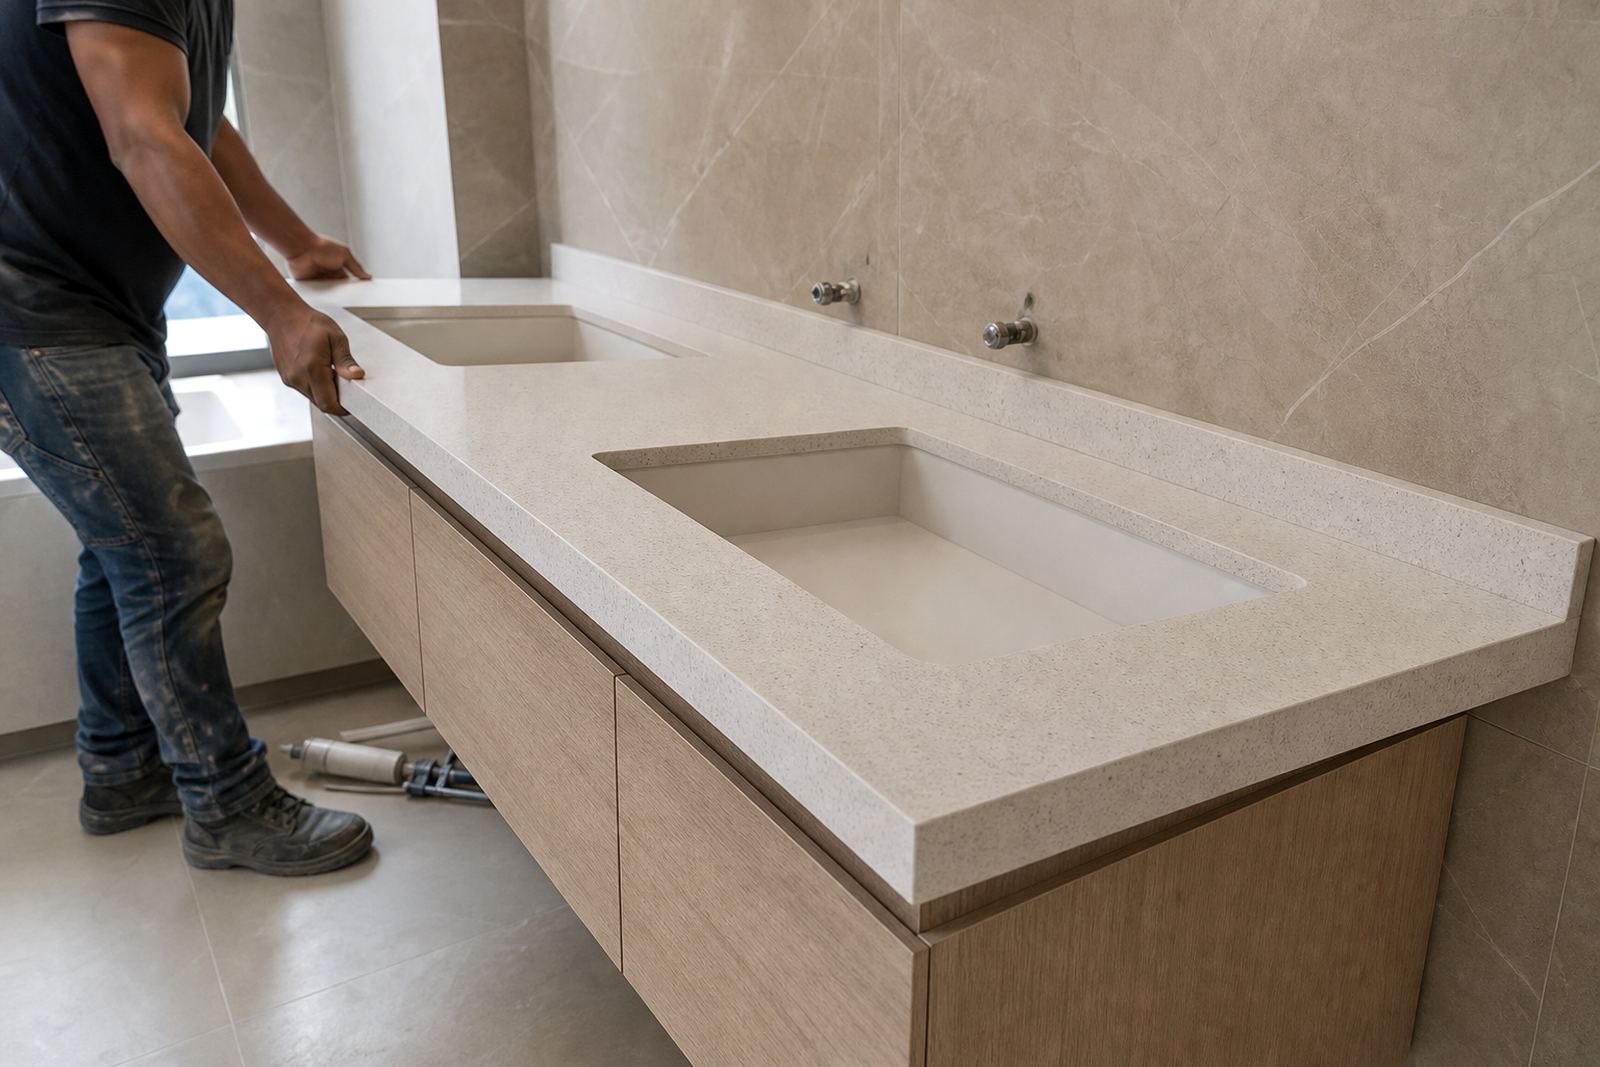
The client was a private homeowner in Fourways working through a bathroom refresh that had to suit everyday family use, not just look good on installation day. The vanity run needed an engineered quartz top with two basin openings, a compact splash detail at the wall, and enough visual calm to make the room feel ordered.
The room had a standard residential footprint, but the basin centres, wall line and cabinet width all had to be measured properly before any cutting was done. Small bathrooms punish loose work. A top that is even a few millimetres out can leave a gap at the wall, a poor basin fit or an awkward overhang at the front.
- Project type: bathroom vanity top and splash strip
- Area: Fourways, Gauteng
- Use case: family bathroom with two basins
- Finish goal: clean lines and easy daily cleaning
The brief behind the top and splash detail
The vanity needed a surface that could handle water, soap residue and the usual movement around a shared bathroom. Engineered quartz suited that requirement well because it is dense, consistent in appearance and can be cut to tidy dimensions for basin openings, taps and wall joints. The client also wanted a low splash strip rather than a full-height splashback, so the wall edge would stay protected without making the room feel boxed in.
We worked from site measurements and templated the layout before fabrication. That let us confirm the front edge projection, the back edge against the wall, the basin positions and the room needed for taps and access around the sink. The top also needed a balanced edge profile that looked neat from eye level and still felt comfortable to use around a vanity where hands, towels and toiletries are always moving about.
- Surface material: engineered quartz
- Top format: vanity top with two basin openings
- Wall detail: low splash strip
- Edge profile: clean eased edge for a bathroom setting
Templating, cutting and seam placement
Johan handled the templating on site so the finished piece would follow the real wall line, not an assumed square corner. That matters in bathroom work because tiled walls, boxed pipes and cabinet carcasses rarely line up perfectly. Once the measurements were checked, the workshop team laid out the slab to reduce visible join lines and keep the grain movement, if present, looking balanced across the top.
Sink cut-outs were marked to suit the selected basin format, with allowance for fixing points and the required edge strength around each opening. The seam plan was kept out of the most visible section where possible, and where a joint was necessary it was tightened and finished so the line would not dominate the top. A vanity surface should read as one piece from normal standing distance, even when two basins sit in the same run.
- Site templating used before fabrication
- Two basin cut-outs set to measured centres
- Seam positioning planned to keep the face clear
- Wall edge checked against the actual room line
What the installation team set in place
The installation covered the quartz top, the splash strip, the basin openings and the final fit against the cabinetry and wall finish. On a bathroom like this, a good result depends on patience around the corners and a clean junction where the splash strip meets the top. The fitter also had to keep the underside clear enough for access while making sure the exposed edges stayed neat and even.
Once the top was in position, the team checked that both basin openings sat square, the overhang was consistent and the front line read straight across the vanity. The splash strip was fitted low enough to protect the wall from day-to-day water splash without crowding the mirror wall above it. That balance gives the bathroom a tidier profile and reduces the number of wet edges around the basin zone.
- Top installed level across the cabinet run
- Splash strip fitted as a low wall guard
- Basins aligned to the cut-outs before sealing
- Final checks made on edge line and joint finish
Care notes for quartz in a bathroom setting
Engineered quartz is a practical choice for a vanity, but the surface still benefits from ordinary care. For routine cleaning, warm water and a mild cleaner are normally enough. Strong bleach mixes, gritty pads and harsh solvents can dull the finish over time, so it is better to keep to soft cloths and non-abrasive products.
Bathroom heat is rarely a problem on a vanity top, but hot styling tools should not be left directly on the surface for long periods. Spills from cosmetics, toothpaste and soap should be wiped soon after use so residue does not build up around the basins or at the seam lines. Around sinks, regular wipe-downs help keep the silicone lines clean and stop moisture from sitting at the wall edge.
- Use soft cloths and mild cleaner only
- Wipe up staining products after use
- Keep hot tools off the top surface
- Check silicone edges around sinks and wall joints
A tidy bathroom result in four weeks
The project took a little over four weeks, starting with the first site visit and ending with fitment. The early stage covered measuring, templating and layout checks, followed by fabrication in the workshop and then installation on site. The timeline also allowed for the cabinet and wall readiness that bathroom work often needs, because a vanity top can only sit properly when the base is ready and the wall line is clear.
The finished result gave the bathroom a cleaner working surface with two properly placed basin openings and a low splash strip that matched the room’s scale. The top sat neatly against the wall, the edges read cleanly and the vanity area felt more settled for everyday use. In a room this size, those small improvements change how the whole bathroom feels, especially when more than one person uses it each morning.
- Project duration: 4 weeks
- Outcome: double basin vanity top with low splash strip
- Finish: clean, understated and practical
- Area covered: Fourways bathroom installation
What we would take into the next vanity installation
Our early templating was the key strength of this job. It removed guesswork from the basin positions and let the workshop plan the top with proper attention to the wall line and seam placement. For a similar bathroom, we would use the same approach, then keep the splash strip low and visually light so the room stays open.
We would also keep the edge profile simple, because a vanity top with two basins already has enough detail in the cut-outs and fittings. Plain lines age better in a bathroom, and they make cleaning less fiddly around the sink zones. For homeowners, builders and fit-out teams working in Fourways or elsewhere in Gauteng, a measured and tidy installation always carries more value than a rushed one.
- Keep the template tied to the actual wall line
- Set basin openings before the final edge polish
- Use a low splash detail where the room is compact
- Leave enough access space under the basins for maintenance
Key facts
| Project | Fourways vanity install |
|---|---|
| Material | Engineered quartz |
| Top format | Bathroom vanity with double basin openings |
| Wall detail | Low splash strip |
| Area | Fourways, Gauteng |
| Duration | 4 weeks |